Other Stuff

Friday, 30 July 2021

Mostly Panelling


While showing my Dad round the Stylus yesterday I pulled on the boot lid & it opened. This was a bad thing because the latch was still umm - latched. The boot lid side was just screwed to a piece of black painted MDF glued to the inside of the lid - only now it wasn't glued any more.

Oh well, better it happens in the garage than on a road trip.

The glue had been on what looked like a plastic sheet further glued to the lid itself & it took AGES to scrape all that off back to GRP, but then I looked round & decided that starting with a new latch would be a good idea. so having collected a few bits of aluminium bracket I made something up, but then stopped when the postie bought me some aluminium sheet.


This was for roofing the footwells to stop passengers kicking the wiring, give me somewhere to put the ECU & water pump controller, stop some rattles & generally tidy the thing up.


Simple job really, measure, cut, measure bend, then frill, fit riv-nuts, apply foam to stop the wiring rubbing the aluminium (which can be very abrasive), fit & admire. The second one (driver's side) I made a little higher by folding the front edge & fitting it to the vertical face of a chassis tube. It gives me a little more toe room & makes it easier to remove, as that's the panel that's likely to have to come off.


Not big, exciting, flash or clever, just one of those jobs that makes the car a little better, makes the wiring easier to sort out as it's not dangling to the floor & hopefully with the wiring all properly supported, it should be a little more reliable.

Also it's aluminium paneling & we know how I like aluminium paneling.

Thursday, 29 July 2021

The Finishing Begins

 There comes a point on every project where the number of things you finish starts to outweigh the number of things you start - I may be at that point!

Yesterday I finished the rear paneling between the cockpit & the boot, it's been a lot of work, it was riveted on around the roll bar, it was flocked, the mounting angle in the boot was just a bent up piece of sheet that wasn't well finished. It's now bolted in with titanium bolts (for no better reason than I had some the right size), it's smoothed out & the excess metal cut off, it's polished (well - brushed finish) & where the join was off-centre, it's now symmetrical, with a new, thicker piece in the centre mounting two power points, one for the radio & one for a camera. I need some more vinyl to cover the rear "shelf", but this part of the car is very nearly done. Depending on how the whole interior looks I may cover the aluminium panels as well.

So I started looking at the dash. I got a blank from CBS, which is an aluminium faced plastic panel, so I used the corrugated cardboard it arrived in to start mocking up the shape. Unfortunately a previous owner has fitted a set of expensive, but not really appropriate 100mm ETB Cobra clocks, the speedo goes anticlockwise & the tacho says "8 cylinder" on the face, but the really inappropriate thing about them is that they're 4 inch dials & don't easily fit on the dash. They were fitted in the centre - Cobra style, I wonder if said previous owner really wanted a Cobra, there's a few things, like the twin white stripes that make me think that. Pity they didn't go for Halibrand style alloys 👍. I'm still deciding whether to use these clocks or put them on ebay & buy something else in 80mm.

Tuesday, 27 July 2021

Judgement Day!

 I was awake at 05:00 - WHY do I keep doing that? But I did some internetting to find somewhere that could change the wheel bearing on the Stylus & eventually strolled out to the garage. I pumped up the Quantum's tyres, because today was MoT day, the first with the new engine.

I went first to my favorite nut & bolt shop to get some riv-nuts & some new bolts for the roll bar, then onto the MoT station passing - strangely - my soon to be ex-wife walking on the common. I waved a cheery middle finger (I was feeling brave as the soft top was up).

AND IT PASSED!

With the MoT cert in my hot little hand & still not quite believing it, I set off home & about a mile out it started to spit with rain. Half a mile out the heavens opened in proper biblical style, the car steamed up all the windows & I had to pull over & wait it out - the heater on full blast wasn't clearing it.

Back on the drive it was still raining very heavily, but I found a raincoat & put the "shower cap" on the car & went indoors. No sooner had I sat down than the doorbell rang with a Car Builder Solutions delivery.

This afternoon I've been occupied fitting a high brake light to the Stylus - the third time I've done this. I've bought the same Hella LED lamp four times - the first time they only made clear, when the red ones came out I replaced it, then bought one for the Quantum & now another for the stylus. I used the same tried & tested method - Make a plate the same shape as the lamp, rivet it to the roll bar along the centreline, Fill in the gaps with Tigerseal & screw the lamp onto the plate / roll bar assembly with the red wire passing through the roll bar & the black one earthed to it

Sunday, 25 July 2021

Making Progress

 yesterday I covered 80ish miles in the Quantum & found another couple of issues - one of the poppers came off the soft top, the headlights are pointing at the road & sadly, the 3D printed throttle body mount isn't coping with the heat. I have two back up plans for that, one is to re-print it in ABS which copes with slightly higher temperatures, if that doesn't work I think I've worked out how to make something similar in aluminium - and as luck would have it, a suitable 5mm thick piece has been liberated from the Stylus where it was doing nothing more exciting than holding up the ECU.

But, on the upside, it's going well & doing better than 30MPG - no exact figure until I fill it up more often, but 35 - 40 should be possible.

So apart from those little bits & bobs, today was all about the Stylus. I decided after getting downhearted the other day that the thing to do was to GET STUFF FINISHED. Job one was the driver's seat & making it fit with the roll bar. I kind of had two plans, re-shape the head restraint or cut it off & mount a restraint to the roll bar like I did with the Fury.

I cut the offending edge off, clamped an aluminium strip masked with gaffer tape to the new edge & glassed up a new flange.


To my surprise it worked really well! With a little filler & some satin black paint it's invisibly mended.

In this photo you can see it's asymmetric, so the passenger seat will have to be done the same.

I also made brown paper pattern & cut & glued vinyl all around the back of both sides of the cockpit, thus doing away with the last of the flocking. HURRAH!! it looks a bit of a mess as it's just stage one, I need more vinyl to do stage two which will hide all the edges of stage one.

After that excitement it was back to the electrics - I have made good progress today though. I have done some general "housekeeping" for example a red permanent live behind the dash was bullet connected to an inch (I kid you not) of orange wire, then crimped to a much thinner black wire before disappearing into the fuse box. It now has a soldered joint, heat shrink & is red from one end to the other. Quite a few of the wires have been de-tangled & shortened, so all the wires going to the same component take the same route - it was a little like a cat's cradle before & finally the electric water pump (which still might go - not decided yet) now has all the wires taken from sensible places, taking sensible routes & are wrapped together & clipped up to structure. Tomorrow I want to do the same to the wiper motor loom.

Then, over the next couple of days parcels should start arriving. stuff from the excellent Car Builder Solutions to make a new dash & waffer theen aluminium sheet to make a floor under the dash to support all the wiring & stop passengers getting tangled in it.

I WILL get this car back on the road!

Friday, 23 July 2021

frustrating Times

 The Stylus continues to be in more & more pieces.

I discovered that the reason the seats weren't mounted propely, is that when you do mount them properly - they don't fit. I bought the roll bar back from the powdercoaters & put it in place, tried to fit a seat & the headrest hits the roll bar long before the seat is far enough back for my legs. I considered this for a while. I considered putting the Stylus seats in the Quantum to replace the Peugeot seats that are so heavy I can barely lift them & buying new saets fo the Stylus, but a quick investigation showed that was going to come in at around £1000 & I'm WAY too mean for that.

Option 2 is to cut the head restraints off the current seats, add a new GRP flange to the cut area to restore the strength & then make head restraints to atach to the roll bar. Far more "me" & almost £free which co-incidentally is one of my favourite prices.

So this morning I sauntered out to the garage to get on with this surgery & immediately got distracted by the electrics, the result of which is that I've spent all day trying to understand someone else' idea of circuit design.

basically it boils down to "I wouldn't have done it like that". There's a permanent live running right cross the dash with a myriad connectors supplying stuff. There's a nice relay box under the bonnet with at least two unused relays, but another four relays are buried in the wiring behind the dash. There's an FIA type cut off switch in the main EARTH & some very strainge wiring.

For example, just before I came in, I was checking circuits & the screen washers had stopped working. I'd listed all the fuses earlier on, so checked the other things on the same fuse - all OK. I traced the wiring from the switch on the transmission tunnel panel to a connector block for the dash (which I'd removed) - onto the dash loom - into another connector block - back into the main loom & on to the wash pump, so it wasn't working because it was disconnected in two places it didn't need to go to.

I will deal with this tomorrow. I also tried to re-instate the wiper stalk, before I did the fix to the stalk itself, I checked the switch part was working, it was. I mended the stalk & now I come to wire it up IT'S NOT BL00DY WORKING! (Sigh)

I'll sort it out.

The basic problem is a number of owners with different ideas working on it - it needs a proper sorting out - which it's geting, but it feels like I'm not making a huge amount of progress.


I did find the ECU was bolted to a 1/2kg alloy plate in the footwell so that got the heave-ho & I've also removed almost a kg of unecessary wiring / relays / switches / gauges, so at  least now when I look down behind the dash, I can see mostly what's there.

Total weight removed from the car 12.2kg - or almost 2%.

Wednesday, 21 July 2021

Ready For The Road trip (ish)

 After yesterday's efforts the Quantum is ready for the Welsh road trip in September.

After moving all the cars around on the drive, I put the Q in the garage & changed the aluminium bottle "catch tank" for the one that came with the Stylus. Two reasons for this, the first being that it weighs almost a kg so I don't want it on the light car, the second being that it's blue. The tank itself is held on by M6 threads cut into the side walls (which are about 8mm thick, hence the weight), so the bracket had to wrap around the body - which I was quite pleased when I managed to make it do.

On to the things I actually needed to achieve. The big job was to wrap the exhaust in heat insulating tape. I've never liked the stuff myself, the idea is to lower the engine bay temperature so the air entering the engine is cooler & so more dense, but I've heard a lot of horror stories about manifolds cracking at the welds because of the increased heat stress / expansion & it's a particularly bad idea on Jeremy Phillips' full bodied designs as the exhaust runs through the bodywork. Insulate the manifold & all the heat it can't dump in the engine bay moves downstream to the pipes through fibreglass - where you REALLY don't want it. But all I was doing was protecting the starter motor on the Quantum so this was just going to be a partial wrap. Job one take off the bonnet, job two drain & remove the radiator (cursing front wheel drive under my breath), then I wrapped from under the sump, up past the starter as far as the two primary collectors, there's only one weld covered & it's a sleeved butt-join in the pipes so should be OK as there's no differential expansion going on there. Then I partially wrapped the starter, didn't see the point in heavily wrapping it as it picks up a lot of it's heat from being bolted to the engine & I want it to be able to cool from that. Then with the remaining tape, I added another layer over the twin down pipes, mostly as protection for the first layer.

Through all this I was wearing proper industrial gloves, but I still itched like mad that evening.

So, re-fit & re-fill the radiator, re-fit the flip front & it was all done except for the shorter alternator belt to keep the pulley from rubbing the sub-frame - which arrived in the post in the afternoon.

By this time it was properly scorchio outside - in the 30s again. But when it had cooled off a bit after tea, I fitted the belt & took it out, yes, it's a lot nippier than before & seems all very quiet & smooth. The steering & gearchange are still horrible, but I've never really done anything about them.

I also got some hours in on the Stylus which turned out to be all very frustrating. I have found out why the seats were never fitted properly - it because they don't fit! With the roll bar in place the seats win't go back far enough to drive comfortably. So now I have a bit of a quandary on my hands. I could trim the seats to fit through the roll bar, but that would affect the strength of the head restraint (I may well only be here writing this because the fury's head restraint worked), or I could buy different seats & move the buckets to the Quantum as the Peugeot seats in that are so heavy I can barely lift them, but doing that will cost the thick end of £1k.

It's a tricky one.


Monday, 19 July 2021

Flocking Hell

A lot of the inside of the Stylus is flocked as I've said, it probably looked great when it was new, but 20 years later - not so much. I've got rid of some of it by chiseling it, more by scraping it & some by sanding it, but guess what I discovered today? If you soak it in soapy water, the glue softens & it comes off quite easily. Not what I was expecting from a finish in an open car.

Anyway the flocking nuisance has gone from the aluminium panels that separate the cockpit from the boot. They were not particularly well made, but today the roll bar came back from the powder-coaters, so I've been carefully cutting the panels to fit each other & to fit round the legs of the roll bar. To my surprise the panels have come up OK after being flattened out & re-shaped, having the scrape marks sanded out & the burrs filed off, they look not too bad at all.

But I now have rather too many plates spinning on the Stylus:-

Drill roll bar for high level brake light.

Fit wire for above

Re-fit roll bar

Drill aluminium panels for riv-nuts

Fit riv-nuts

De-flock the rest of the inside

Fit the seats

But mostly I need to get the Quantum sorted, so when it's cool first thing tomorrow I need to swap them round & get the Q ready for the rolling road, then I can drive it.

Progress

 I think the electrical problem with the ECU is solved. The first problem was that - yes - I'd misinterpreted the wiring diagram, my fault, but in my defence the power wire to the ECU is red & in every car I've ever worked on red is permanent live, but hey-ho. The next problemette was that I'd connected the wire to the master switch in the engine bay, so had to dismantle that to get it out. Of course I now have a LARGE stock of wire to choose from when looking for a new piece to connect it up with & found just the thing.

While wandering round the garage I spied a couple of unused fuse boxes & decided the best course of action was instead of tacking wires onto some other existing branch, fit a new fuse box. The existing relay that controls the injectors, Idle Speed Control Valve etc had an in-line fuse - I don't like in-line fuses, I worry I won't think to look for it at the road side when the car's died. So with a little re-wiring I re-routed the supply to those things through the new fuse box at one end & installed a switched live supply at the other, each with an unused "way" for future growth & wired it all back up. It worked! -OK, I think it worked. Pretty certain really.

Next job, sort out the alternator pulley. On the way to the Rolling Road there had been a nasty grinding / rotating sound when pulling away in first, on the way home this had vanished - but was replaced by the shrieking of a drive belt. Chris-the-mapper had pointed out that the alternator pulley was rubbing the engine sub-frame & now I came to look at is more closely the belt was now loose - the alternator had been pushed back as the engine moved forward under load.

I ordered a shorter belt, hopefully - job done.

That was about as far as I could get with the Quantum, so my attention turned to Stylus. The roll bar is still at the powder-coaters, so I looked at the aluminium paneling around it. I've been impressed by the build quality the original builder achieved, but I guess sheet metalwork was not his thing. Some aluminum angle I'd ordered to replace bent-up sheet angles had arrived so I transferred the holes in the boot floor into it, cut it to length & jig-pinned it in position so I could look at re-fitting the panels around the roll bar legs. The holes in the sheets are a bit "all over the place", but I drilled them off & spaced some new ones. I don't like having this sort of thing permanently attached, so it'll be held on with bolts & riv-nuts.

It would be nice to have these panels in bare aluminium ( I do like a bit of bare aluminium paneling), but by the time I'd scraped off the flocking, the surface was all scratched to hell so I don't think that's going to be possible. Also, the join between the panels wasn't central - this isn't a problem because I need a couple of power outlets in the rear panel & they're very thin aluminium, so I've shortened them & I'll make a thicker piece to join them up & mount the power outlets.

But it is nice to be working with all the old sheet metal tools again.

Friday, 16 July 2021

Bad News, Good News


It's been a busy week, the plan had been to get the Quantum on the rolling road & get it up for sale, so to that end I made & fitted two new door cards - which while they could not be described as "of professional standard" are better than what was there before, I also did other tiddivating, taxed it & drove it to Tescos for fuel. This was a stressful thing, but not as stressful as what was coming.

I did a lot of checking prior to the rolling road, I mended a slight leak in the exhaust, I checked it for oil leaks (they do NOT like oil on the rollers), water leaks, over heating - all fine.

I arrived at Surrey Rolling Road - it's in Hampshire, but only just - 5 mins early & the car was reversed into the sound-proof booth. After a chat with Chris & strapping the car down I went to sit on the comfy sofa, but after a few minutes the door opened & a rather sheepish looking Chris said the throttle pedal had broken when he tried to calibrate the Throttle Position Sensor. I went to look & the fitting I'd made to hold the cable outer had broken allowing it to fall into the car. I have to say I flew into a bit of a panic, more so when I realised I'd not bought the car tool kit.

But with Chris' help & suggestions, we cobbled together something that worked & I went back to the sofa.

It didn't last. After a few minutes Chris re-appeared saying the ECU was permanently on - looks like I'd wired it incorrectly, so to turn it off for the calibration I disconnected the battery, reconnected it & went back to the sofa. Shortly after that Chris re-appeared again saying the car wouldn't start The starter had got too hot (it's right next to the exhaust), so that was game over (sigh).

On the upside the car was MUCH nicer to drive on the way home.


So today I have been to my Brother's & turned up a top hat fitting in aluminium (actually the Stylus' enormous gear knob) to replace the plastic one that broke. I've also ordered some heat wrap to cover both the exhaust & the starter & tomorrow I'll look into the electrical gremlin & one or two other things that emerged from actually driving the car.

So the Quantum continues to be something of a problem child.


In the spaces between all the above, I've also done a few jobs on the Stylus. I finished & re-fitted the passenger door, investigated what can be done with the foot well panels, & printed a plenum for the heater unit ready for the ducting.

Tuesday, 13 July 2021

Fuel System

 Today I tackled the fuel system, there were too many filters & there was not one protecting the fuel rail. So first job, remove a high pressure filter from the low pressure part of the system, also remove the mounting (which was heavier than the filter) & it's spacer block (which was heavier than both) & re-fit it with a simple p-clip to the side of a tray which I suspect was the battery tray when the car ran carbs. Then re-route all the fuel lines into a straighter route which as a bonus means they are also hidden below the air filter. Getting this right took most of the day, but I did also fit the new rear No. plate & wired up the lamp. The roll bar is still at the powder-coaters, but to me that looks smoother & better. I've also tried to find somewhere to put an oil catch tank. The car had one but it weighed 3/4kg empty which for a simple bottle to carry mostly air about in is quite a lot, so I'm looking for somewhere to mount something simpler & lighter, but it'll need to be emptied from time to time so access is an issue.

More thinking required.

Just before I left the garage I tried to find out what a switch on the dash did - it had a red tell-tail & when I turned it on there was a faint hum. It turned out to be this item. 

It was mounted under the dash top & has a small motor (about 1" dia) connected to a pump, when on it creates a vacuum in the pipes, there is a non-return valve to hold the vacuum, a solenoid operated valve to draw air from one of two circuits & a pressure switch which shuts the motor down when a vacuum is achieved. But it's so small I have no idea what it could have been for. Maybe something to do with the Supercharger? Some pre-oiling device maybe?

It weighed nearly 300g so it's gone anyway.


Weirdness. 

Monday, 12 July 2021

Heater - Installed

 It was a bit of a nasty job, but the heater is now fitted - not plumbed in, but it's installed in the car just outboard of the hydrulic reservoirs. I'm quite pleased, the de-painted alloy panels look nice & the heater itself tucks nicely out of the way. The two halves of the mounting panel are now reasonably easy to remove, but a couple of the riv-nuts in the chassis span when I removed it. I managed to replace one, I may need to do some others, but the holes have been drilled oversize.


Before I was dressed this morning (yes, I know - too much information), I drew up the intake which will get bonded to one of the gill slits in the front wing, I'll print it as soon as I get some black filament.


I also drew up the plenum to supply the screen vents, it's divided, with one chamber bigger than the other, this is becase every car I ever had (except the Fury) seems to de-mist the passenger side quicker than my side, so I'm hoping if most of the air goes to the driver's side it'll clear first.

The heater fan seems to be powerful enough, so fingers crossed.


Also on the agenda today was fitting the driver's side door trim in the Quantum, which I failed to do as I need some longer bolts (on order). So I went off on a shopping trip to get bolts for the heater & pick up the Stylus' new rear No. plate (sigh).

My first mistake was ordering it from Halfords, for a start they wanted £18! They also wanted four days on account of "they only make rectagular ones" so my square one would have to be ordered in. The very next day my phone rang but I didn't get to it in time, it was an Aldershot No. so I called back & got through to an Indian lady, who wasn't in Aldershot. She couldn't get the branch to answer, but assured me she'd left a message for the manager to call me.

You know where this is going - nobody called. A few days later I was passing so I dropped in:-

"I'm here to pick up a No. Plate"

"Have you bought your documents?"

"No, I showed them when I placed the order"

"You need to show them when you pick the plate up as well"

"I wasn't told this"

"It would have been written on the paper you were given"

I'm afraid I flew into a bit of a rant & stomped off, so today, armed with the documents I showed when I ordered the plate AND the receipt I was given which said NOTHING about taking documents again at collection, I went back to Halfords & guess what? I was just handed my plate I told a message had been left on the seventh (it hadn't). No documents requied! (sigh).

But, on the upside, the plate is a very thin one - just a sticker on an aluminium sheet, so this is a good thing, I shall be cutting it down to the minimum legal size, so Halfords logo will be cut off.

While rumaging in the inner wing I found that one of the fuel filters it doesn't need was mounted on a "spacer" which is just a 1"sq x 5" long alloy block, NOT the work of the original builder I might add.

While walking into the house this afternoon I was a little surprised to see a cat in my dining room, it was startled & tried to run for the kitchen, claws on a hard wood floor don't grip well & it went into a four-paw drift as it rounded the corner, spotted a cat flap & tried to make good it's escape at full pelt. I was just in time to see it hit the cat-flap - which I've gaffer taped shut to stop draughts. There was then more scrabbling & skidding as it went past me out of the French doors & I haven't seen it since. I did snigger, it was like Tom & Jerry made real

Sunday, 11 July 2021

Blowing Hot & Cold


One thing the Stylus lacks is any form of de-mist for the screen. It must've had something once for SVA & there are slots in the dash top. A few times in the Fury I had the screen fog up on autumnal mornings so it needs something.

My brother had bought a small heater unit for his hotrod truck but hadn't got around to fitting it, then saw something he liked the look of more, so I had the small one. But first......


.......today I mostly trimmed the second door, but the nice nylon spacers on the driver's door turned out to be a piece of ratty MDF on the passenger side. Nylon spacers ordered. I also mostly fitted the first trim panel to the Quantum, but couldn't find a 7mm drill for the riv nuts, I managed with a 6.5 & a file - then I lost the 6.5!

The heater will fit quite nicely to an aluminium firewall panel outboard of the steering column, but getting the panel out proved to be something of a nightmare, but in the end it surrendered. It was only a little bent.

While it was out I took the opportunity to take the paint off it & as it's the panel a lot of the wiring passes through, I've cut it in half & made a join-up piece so in future it'll be much easier to remove - except half of it will have a heater attached of course.


Tomorrow I'll rivet the joiner to the right side & put rivnuts on the left side, so the right side can be unbolted & removed. I've also drawn up a plenum to bolt to the fan inside the car to distribute the air to the dash top & an intake to fix over the inner face of one of the "gills" in the front wing, so it will only take in fresh air.

Should work a treat


Saturday, 10 July 2021

Essential Maintenance


Of all the work the two kits need at the moment, re-upholstering the Stylus' driver's door is probably not the most pressing, but that's what got done today anyway.

The doors were OK(ish) the bezel round the door release on the driver's side was broken, the vinyl on the door itself was unpeeling & there was an MDF trim panel screwed - sort of - inside that.

First I made a new bezel from aluminium, so that was pretty easy, then I took the door off. As I undid the last of the bolts there was a heavy sounding clank & the door came away. The clank was made by a bracing plate tying the hinge frame bars together - 6" x 4" & made of 2mm plate (appologies for the mixed units - I worked on Harriers for most on my career). I put the door back on in the hope it didn't need it, but it seemed flimsy, so I re-made it in aluminium with two flanges instead of one & two flanged lightening holes. the old fish weighing spring balance in the garage said the old one was 1/2kg while the new one failed to register. I also replaced the hidden but ugly bolts with titanium ones as they'll now be on show.

The next job was to cover the inner door face with new vinyl & punch through where the holes were & re-fit the door. It now doesn't need the trim panel at all, that tipped the scales at 1kg, so when I've done the other side, that'll be 3kg of mass lost in the door alone (with more to come when the heavy stainless side window supports go). Total mass reduced on the car is now 9.5kg or 21lb in old money. In the photo below the clamps are still in place while the glue cures.

Yesterday I counted fuel filters - that might seem an odd occupation, but I realised there was a small filter in the feed pipe to the low pressure pump the car probably doesn't need (there appears to be a sump in the fuel tank), the facet LP pump has a built in filter, so that's two filters in a row. The LP pump output went into a "filter king" pressure regulator & filter combined fitted by one bolt to the centre of a sheet metal panel & the fuel then went forwards to the engine bay, to another filter - so that's another two filters in a row. From there into the swirl pot & out again through another filter & into the high pressure pump & on into the fuel rail. Note dear reader, there is no filter protecting the delicate injectors form any debris the HP pump spits out. So yestedays job was to remove the filter king as it was by far the heaviest & most badly mounted, I need to re-route the pipes at some stage to send the high pressure fuel through a filter.

Also yesterday I took the seats out & mounted them by all four mountings as they were only attached by the front two mounts which made them a little wobbly.

Every day the car gets a little better.

Wednesday, 7 July 2021

A Tale Of Two Bars


Roll bars in this case. It's a strange thing that both the kits have roll bars with very poor surfaces, the Quantum's had been kicking around the manufcturer's yard for some time when I bought it, so that's understandable. But the Stylus' is lumpy & 1/2 repainted & it was covered in stickers - some of which had been sprayed over. So today I took the roll bar off the Quantum, cleaned it all up, gave it a coat of satin black & ..... then took the roll bar off the Stylus. This was a much more involved job with the bolts going through the chassis to the underside of the car & the rear wall of the cockpit having to be dismantled to get it out. But out it is & tomorrow I shall enquire about getting it sand blasted & powder coated.

Also on the jobs list for today, was a number plate light. I have a thing about kit car tail lights, so many seem to have had no consideration given to shape or size & some look like they were thown at the car & screwed on where they hit. Fortunately my Stylus did have some thought applied & it has Fiat Coupe lamp units which suit it perfectly. But the No. plate lamp is the usual "classic car" job as fitted to myriad Leylands from the 50s to the 2010s on Land Rovers.

On the Fury I sunk the No. plate into the rear panel, put a Peugeot 206 rear fog lamp either side & a discreet LED lamp in the overhang thus created. It was a lot of work, but I thoght it looked really rather good (other opinions are available) but it wasn't going to work on the Stylus. I bought a pair of cheap light bolts, but they were disapointingly large, then while wandering in the garage I happened upon some 5mm white LEDs I bought for the panel lights in the Quantum, drew up a simple housing that would fit under the boot lip & printed it. So like the Fury, the Stylus should have no visible plate lamp.

Monday, 5 July 2021

Tired Now

 Ever since the Stylus arrived I've been putting in around 12 hours a day on the cars & I'm knackered!


But I have achieved. The flip-front on the Quantum is painted & rubbed down, I need to polish it more, but it's looking good. Today I swapped the cam covers over, the Stylus' one was powder-coated blue, so while it looked nice, it wasn't really the look I want for the Stylus, so I cleaned most of the red coating off the Quantum's cover & put it on the stylus & yes I know it looks ratty now, but it'll look better when it's finished. I filed off the "16v Zetec" & "Ford" lettering as well as a raised rectangle, so it just needs finishing.

It won't take a proper polish (too much zinc in the alloy) but I'll clean it up more than it currently is & buff it a bit. 

My plan is to replace all the plastic covers with alloy fabrications, so it'll fit right in.

I know it's not to everybody's taste, but bear with me - it'll work out.

Also in the list today, there was a hidden switch to cut power to the LP fuel pump, which means that thieves can only drive the car until the swirl pot empies - about 10 miles if they're carful. On closer inspection the switch looked very industrial, so it  was replaced with a smaller, lighter one.


On the subject of smaller & lighter, I was walking on the heath at the back of my house with Duncan from the SKCC some time back when we happened upon some blank bullet cases (the Army use the area to practice "running-about-&-shouting), usually they're very good at picking up after themselves, but they'd missed a few & saying "I could make something out of those" I put them in a pocket.


Well now I have, I replaced the large alloy stalk ends with the bullet cases - as brass is an alloy they've gone from billet alloy to bullet alloy - see what I did there? I also re-instated the missing wiper stalk, so in the fullness of time, I'll remove the wiper switch in the centre & wire the stalk back up.


Finally for today, a large box arrived with sticky-back foam in. The seats in the Stylus seem to have one complete set of foam pads shared between them.

I'd looked into upholstered pads & while they were a decent price, they were more than I wanted to pay right now, then up popped an ad for a dozen 10mm thick x 500 x 300 self adhesive foam sheets for £10, they arrived today & I've made a set of pads for both seats. They are NOT of professional quality, but will suffice for now.

And yes, Blatter still can't turn an image round

Saturday, 3 July 2021

Cover Up

 When I removed the carpet from the boot I found an enormous hole with the gubbins of the fuel tank poking through, so I tidied up the wiring so it all passed through a grommet & then stared at the hole. I remembered my ol' mate Chris Chapman (two mentions in a week Chris!) who had a similar problem with the Stylus he built more years ago than I care to remember. His rather neat solution to creating a bulged access panel was to cover the gubbins in something with some thickness (I used a folded rag), tape over the hole with duct tape, then fibreglass over that. Hey Chris - it still works! It doesn't look terribly neat, but it's under the carpet so protecting the tank gubbins from the toolbox jumping about in the boot is the main priority


Here's the hole padded & taped over.


Glassed over


Panel drilled & trimmed


Painted & fitted.


After that (& polishing the Q's bonnet some more) I looked at the bonnet hinges because the bonnet was wobbly. What I found was the "hinge pins" were actually the plastic tyrap(ish) things used to hold a rad fan on. Kit cars eh? (sigh) 😁

So, I took the whole hinge frame & bonnet off, drilled some holes in it - because some things just HAVE to be done - painted it silver as it was starting to rust as the powder coat peeled off & reassembled it with titanium bolts as the hinge pins.

It's not as wobbly now.


.

Friday, 2 July 2021

... It's Just a Prop

I've dreamt of this for a long time - sitting in my own house with the doors open onto the back garden with a rum & coke, writing about the mods I've made to my kit car. Ahhhhhhhhhhhhh

It's not even spoilt by the e-mail from my solicitor saying my soon-to-be-ex-wife wants to add a statement to the divorce agreement saying I'm doing SO well I can afford to work part time while she has to get an extra job to support the children. To be clear, she wanted the divorce (utterly devastated me), the "children" are 26 & 23 & both work & I have had little work since December & none at all since April.

But I digress.

Today was mostly spent painting the bonnet of the Quantum, it looks good, I shan't know how well it's gone until the vibration from the engine has cracked the paint - or not, but so far, so good. It'll be up fo sale soon, so maybe I should tke the advertising photos now?

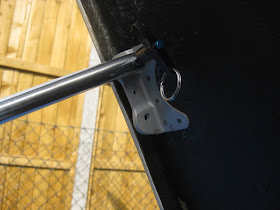
But the point of the title is todays job on the Stylus - I have once or twice called it "the Fury" - is that OK or is it like calling your girlfriend by the previous gilrfriend's name? I must admit to adding a little weight, on the other hand I've gained a passenger seat because I no longer need to carry a 4ft stick around to prop the bonnet open with. This is also a slightly momentus occasion because the Stylus has gained it's first Harrier part, a forged bracket (not a forgery - it was made by being forged) that failed inspection & it now serving as the prop reciever.

Yesterday I fitted a grille over the radiator - it came with a nice piece of mesh that had been siliconed into the rad intake using at least 1/2 a tube of silicone, the previous owner had removed it, but that left the rad unprotected. When the car was supercharged there was presumably a charge-cooler in fromnt of the rad, I used the threaded bosses to attach a cut-down mesh with sides folded for some stiffness so now any rabbits or pheasants entering the big hole at the front will get slowed down (or possibly diced) before they hit the rad.

Other things I've found out about the car:-

It's really VERY DIFFICULT to get the sump plug out - I managed, but I was expecting the hex to come off it at any moment.

The wheels arn't very safe - the wheelnuts only have 6 turns of engagement, which equates to about 9mm, or only 3/4 of the stud diameter. On the back I've fixed this by removing the wheel spacers (3/4kg each of unsprung, rotating mass) but the front I guess I'll live with by regularly check tightening the nuts until I get the wheels sorted.